Carving Techniques for Handling Inclusions in Transparent Gems
Inclusions don't have to result in a loss of mass or value when cutting transparent gems. Learn how to manage inclusions with basic gem carving techniques.
3 Minute Read
Well, there is hope. With a few simple carving techniques, you can remove or camouflage the inclusions and turn these leftovers into wonderful pieces with minimal effort.
If done well, the results can be worth as much or more than if the stones were clean and faceted. You'll not only make good use of the rough but also recover your investment!
Removing Inclusions
One simple approach to managing inclusions is to cut them out and create a design based on those cuts. Here is an amethyst with a cluster of inclusions near the bottom and right (highlighted areas) where they would be most visible.
I removed the small inclusions with a wheel-shaped bit. (See Cabochon Carving Tools and Techniques). As I did, I began to see something like a beehive design developing. After I removed the central inclusions, I expanded the beehive to fill the center. Here is the finished stone. All the uglies are gone, and the carving looks purposeful.
Camouflaging Inclusions in Transparent Gems
If you have transparent gems with too many inclusions to remove, consider camouflaging them, instead. One of the simplest methods is to cut a cabochon and leave the bottom rough. Rough shaping a gem leaves tiny, subsurface fractures. On the bottom of a cab, however, these add sparkle. The frosted and sparkling surface camouflages small inclusions and draws attention away from larger ones.
Here is another included amethyst stone that was cut from the same rough as the previous piece. It has several veils, some running all the way through the stone.
I cut a simple design on the crown of this stone. While it's hard to see from the pictures, the carvings are directly over the largest veils. This greatly reduced their visibility. Their main purpose, however, was to draw attention to the top of the stone. (Remember the general rule: if a stone is transparent and clean, put the accents on the bottom. If it's included, put the accents on the top). The smaller veils were still fairly visible, since they reflect light so well. To further camouflage the inclusions, I ground the bottom down with a 180-grit wheel and left it frosted. This did wonders for the stone. The frosted bottom effectively overpowers the smaller inclusions, while the carving draws attention to the top.
Note that carved areas are not polished again. If they were, they would be less effective at attracting attention and might even magnify the inclusions they were designed to hide!
Keeping Inclusions
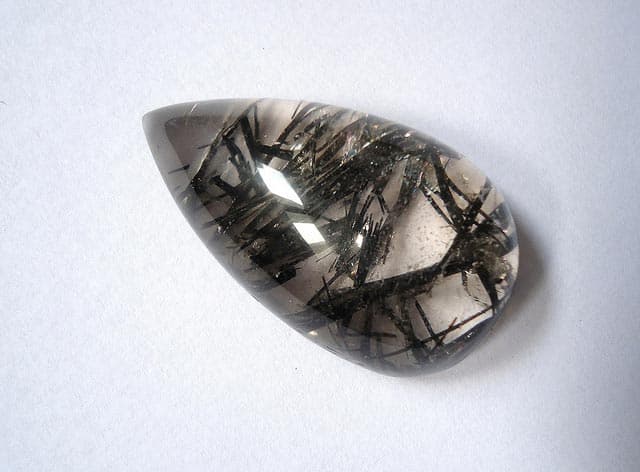
The simplest technique for dealing with inclusions is to keep them. Sometimes this is the best option, too. Many inclusions in transparent gems are interesting or attractive in themselves. Rutilated quartz is a prime example.
This aquamarine was a faceter's nightmare. It had beautiful color but also a large fingerprint inclusion running down the center. The stone had plenty of room to facet on each side of the inclusions, so I sawed it in two. While sawing along a fracture, a big chunk broke out of the center. This was the side that would have been the table. It was already a bit thin, so cutting down through the ruptured area would have left it too thin for faceting. I domed this stone and then examined it. The break provided an interesting element, so I simply left it. As I was polishing the bottom, pieces broke off the hole and made scratches across the bottom. Once again, I was lucky. They look purposeful from the top and added interest to the design.
Note the high dispersion on the break. If you carve a reverse intaglio in a gem with high dispersion, it will be even more dramatic. This is an excellent technique for zircon, sphene, etc.
Magnification Tricks For Transparent Gems
Another method for hiding inclusions involves magnification. The shape of a cabochon magnifies whatever is on the bottom. If you cut a concave curve on the crown, however, the center will be the focus and the bottom and edges will appear reduced.
Here is a piece of carved Madeira citrine. At the top is a feather that runs a third of the way down the center line. You can see a bit of it at the top of the photo. Notice how clean the center looks? That's because the lens is concentrating on the center and the elements on the outside are moved from view.
Below is a picture of the bottom of this citrine. You can see how large the carving actually is. The feather I was trying to hide runs right down to the top of the middle branch.
Donald Clark, CSM IMG
Related Articles
Designs and Designing: Tools
How to Cut a True Checkerboard Heart
Umba Sapphire Parcel Colors
Choosing Faceting Angles
Never Stop Learning
When you join the IGS community, you get trusted diamond & gemstone information when you need it.
Get Gemology Insights
Get started with the International Gem Society’s free guide to gemstone identification. Join our weekly newsletter & get a free copy of the Gem ID Checklist!
